
No Homelab is complete without a state-of-the-art Identity and Policy Engine. Of course there is an official install guide available here which is written for supported Environment ect., but there are always us, the odd few who travels a different path and want to install it on an Intel NUC based homelab.
At the time of writing the latest and greatest ISE is 2.4, which can be obtained from cisco.com. For homelab situations I’m going with the 100 Endpoints eval version.
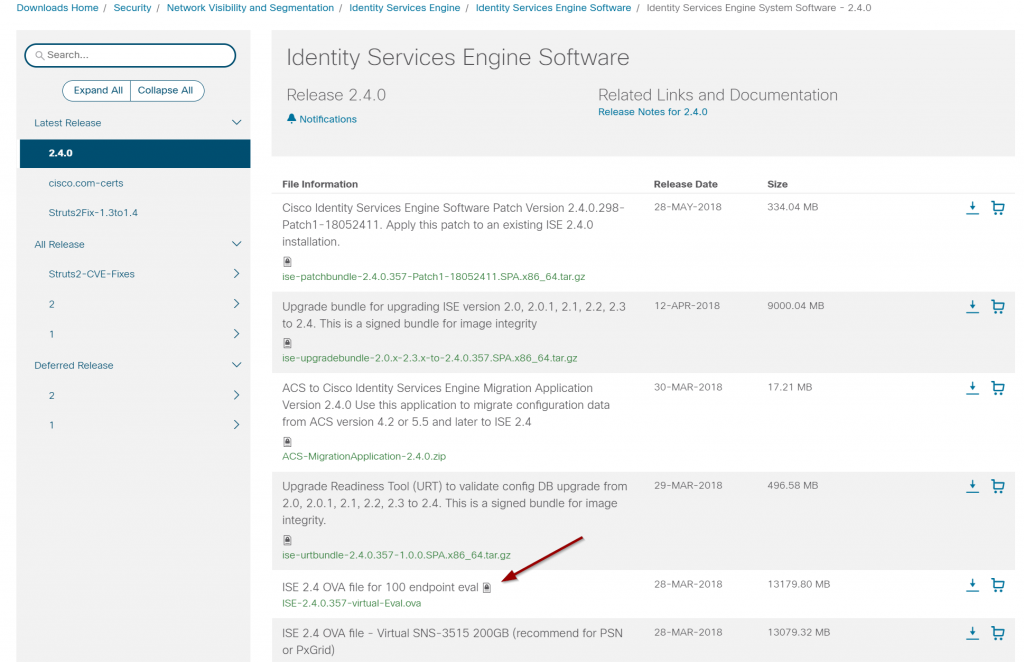
Download ISE 2.4 from Cisco.com in the 100 endpoint eval version
Deploying to ESX
If you after downloading the .ova tries to apply it to an standalone ESXi host, you are in for a disappointment, as this yields an error.
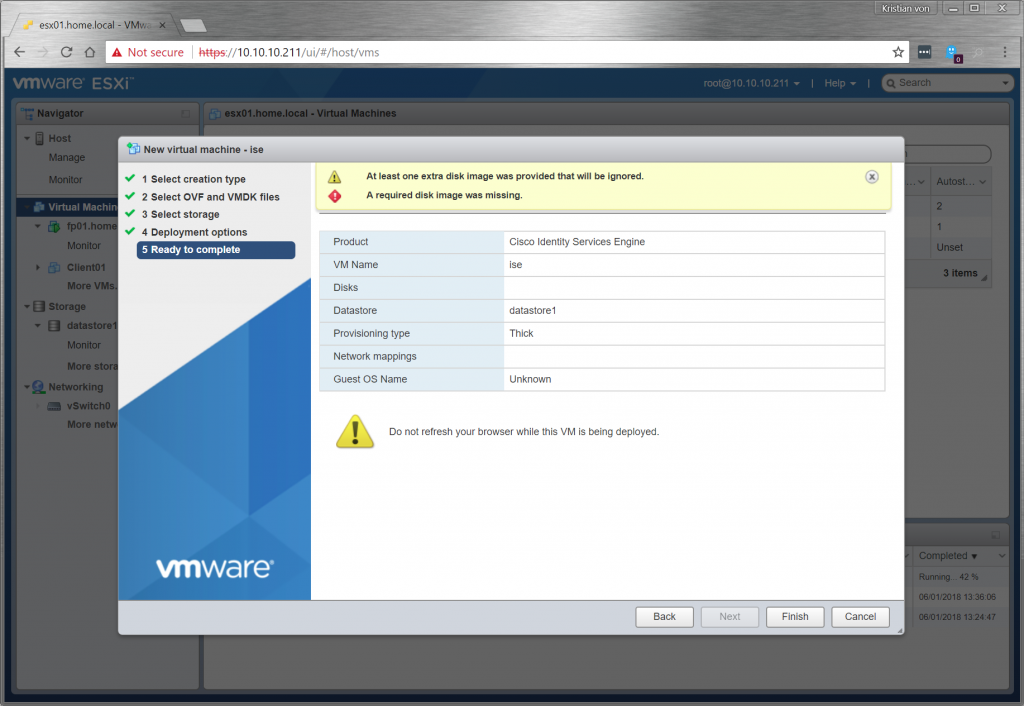
Deploying the ISE 2.4 VM directly onto an ESX through the VMware UI results in the following failures: “At least one Extra disk image was provided that will be ignored” and”A required disk image was missing”. This type of problems are seen with at wide range of different virtual appliances from different vendors. Luckily it is fairly easy to circumvent.
The workaround
The trick is to utilize VMwares ovftool utility (downloadable from VMwares homepage), as this is capable of ‘scripting’ the necessary parameters.
C:\Program Files\VMware\VMware OVF Tool>ovftool.exe --acceptAllEulas --diskMode=thin --name="ise01.home.local" -ds="datastore1" "C:\Users\user\Downloads\ISE-2.4.0.357-virtual-Eval.ova" vi://10.10.10.211/
Opening OVA source: C:\Users\user\Downloads\ISE-2.4.0.357-virtual-Eval.ova
The manifest validates
Accept SSL fingerprint (A0:2E:6A:CA:97:BF:85:FB:A0:73:4E:18:D0:C2:60:32:AF:72:C3:28) for host 10.10.10.211 as target type.
Fingerprint will be added to the known host file
Write 'yes' or 'no'
yes
Enter login information for target vi://10.10.10.211/
Username: root
Password: ********
Opening VI target: vi://root@10.10.10.211:443/
Deploying to VI: vi://root@10.10.10.211:443/
Disk progress: 35%
It should then merry start uploading the image to the designated ESX host.
Adjusting the hardware allocations
You will probably also want to adjust the assigned ressources if your are running on an environment that is scarce on resources. Do give it a bit though as it will otherwise not perform very well.
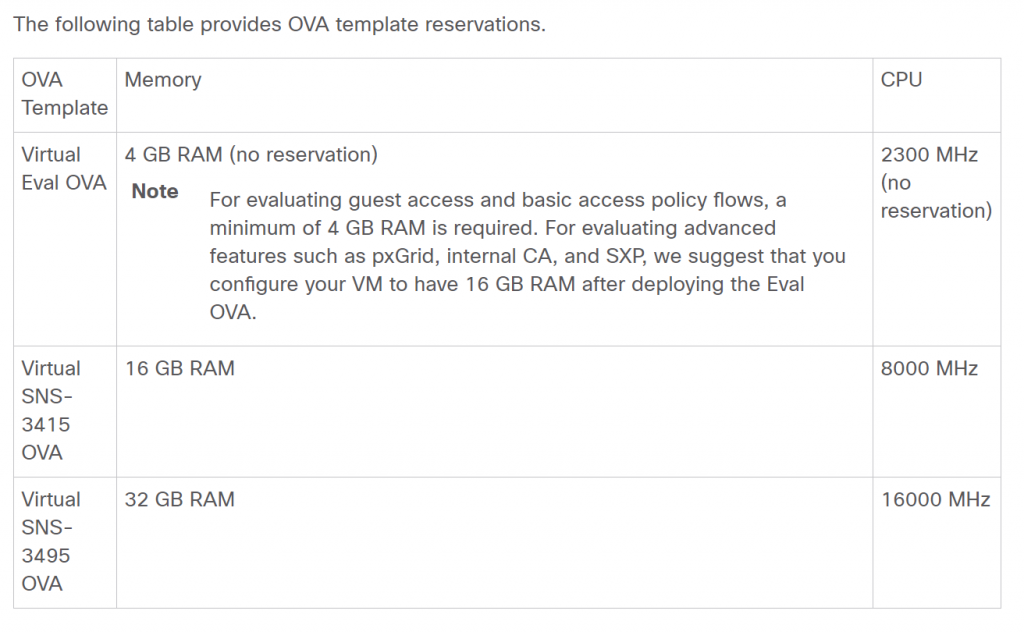
Give it at least 4GB of RAM for it to do all the basics. Full VMware specs requirements can be viewed at Cisco.com
And dont forget to remove the reserverations as the Identity Service Engine will otherwise starve your system.
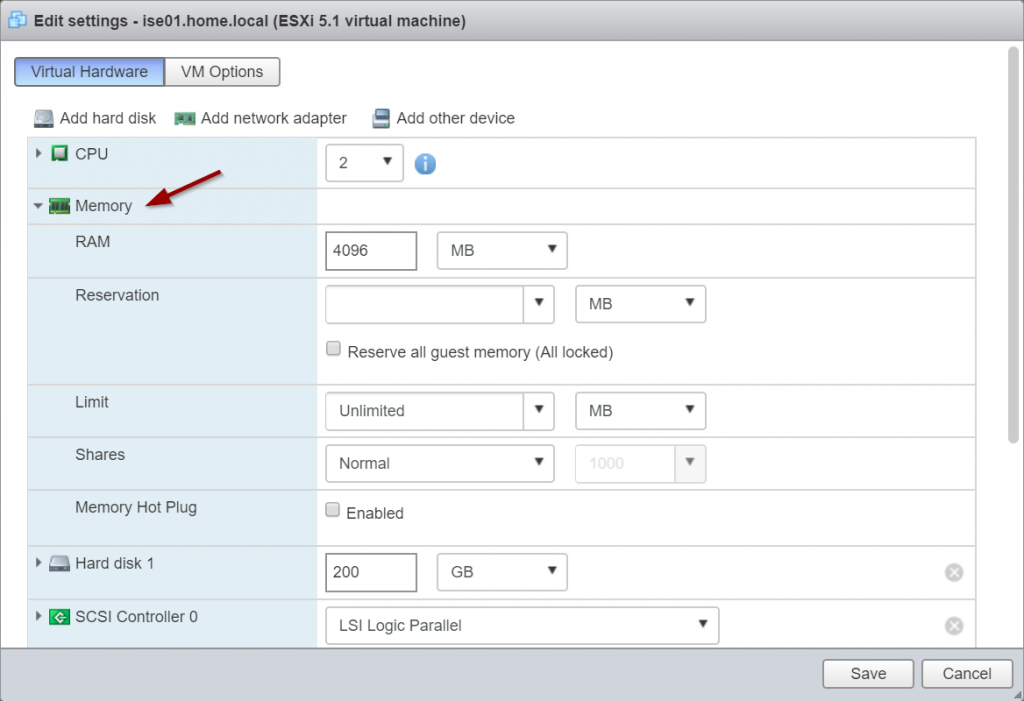
It is usually the RAM which are in short supply on mini labs, so adjust these settings as needed.
The deployment comes with 4 vNICs by default, however you only really need one.
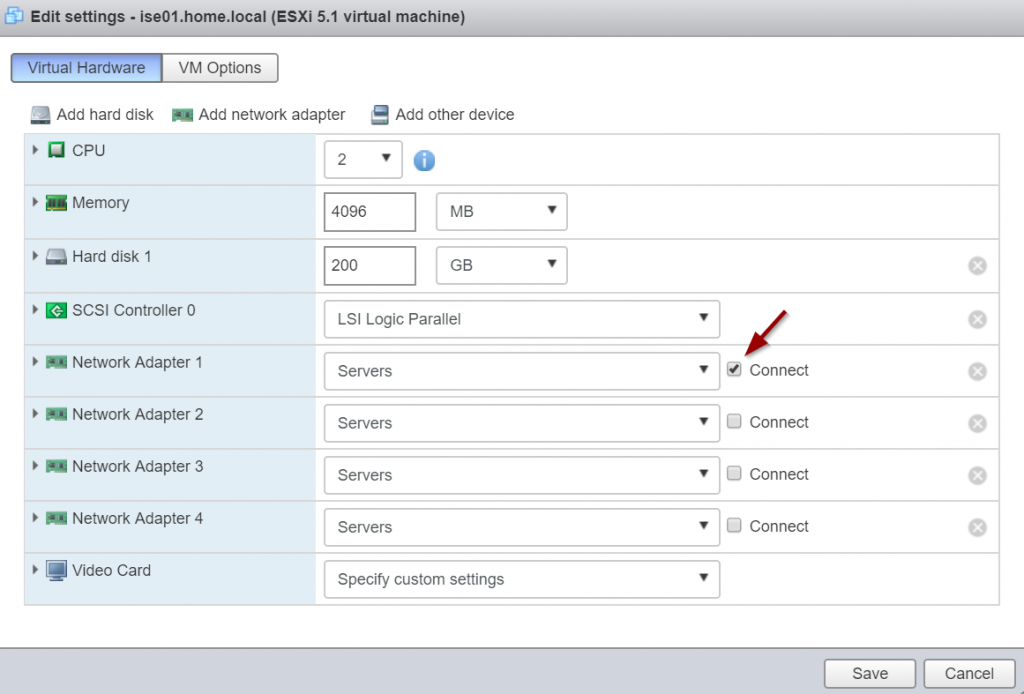
Go ahead and disable all but one interface, if you are not doing anything flashy requiring multiple interfaces,
When you have gone through the initial CLI config steps and have it up and running, make sure to change the default password policy.
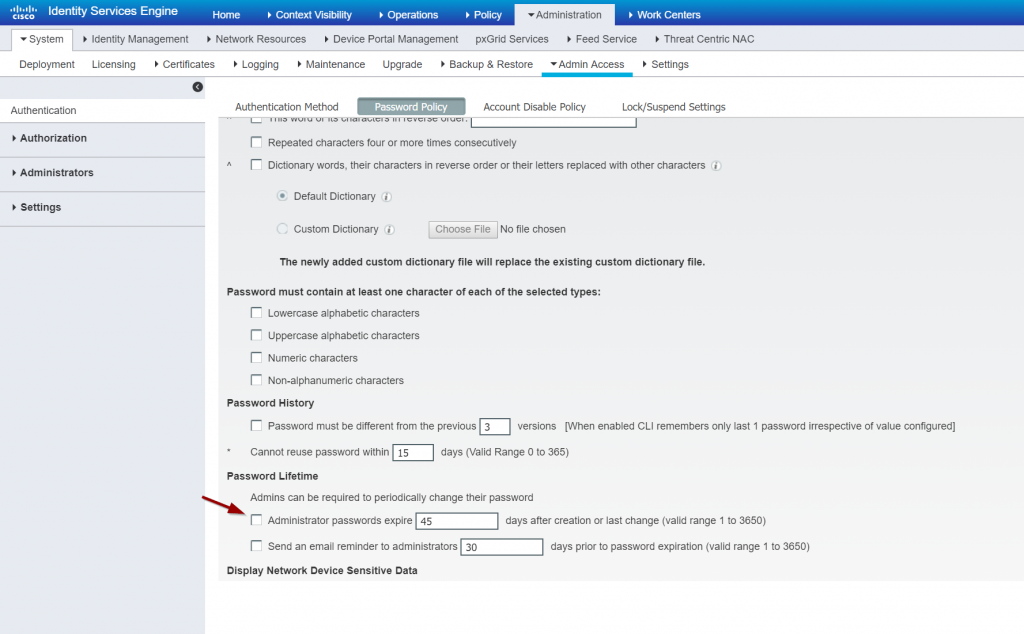
Remember to change the default timeout for password policy. As you can otherwise risk being locked out
The ISE install will provide an evaluation period of 90 days for learn and play.
edit: Fun stuff.. just found another guy who had done a pretty similar post (before me). anyway check it out.
May I ask how was the ISE performance in Intel NUC. I am considering going for one NUC to build a lab with ise, prime, firepower sensors and fmc, with win server. Just wanted to check the feedback on running it on NUC. (Temperature issues, performance issues in NIC etc)
My NUC is unfortunately of a somewhat older model.. hence it struggle a bit with to little memory. The newer models have double RAM of what mine can support, so I think the newer models are more appealing. To little memory seems to give a bit of instability in the environment, especially when running more VMs on the box. CPU seems never to be a bottleneck.
If you are to run it all in a single NUC it may be at bit much for it to handle .