
When in the CCIE lab, verification is critical! Every once in a while, you want to make sure that everything is still working as it is suppose to. Luckily there is a great tool in the IOS toolbelt which can be a life saver! TCL. In this post i will show the very basics of a CCIE lab verification script along with some real lab pointers and use-cases.
Sure you can do the occasional ping test towards random addresses through out your lab. But in the best case it will only show a subset of the desired connectivity (did I now include all the network statements, did my QoS/firewall/ACL/redistribution destroy anything etc.).
Normally I go with the simplest of scripts (this was what I used at my lab exam):
tclsh
foreach IP {
192.168.255.1
192.168.255.2
192.168.255.3
192.168.255.4
192.168.255.5
192.168.255.6
192.168.255.7
192.168.255.8
192.168.255.9
} { ping $IP timeout 1 repeat 2 }
remember to exit out of the tcl shell with
tclquit
where the list of IPs are the ones I want to test. This is pretty straightforward as the script just takes one IP at a time and issues the ping command with ‘timeout 1’ and ‘repeat 2’ options. you will want to do ‘repeat 2’ due to the fact that ARPing may trigger the first packet to timeout. ‘Timeout 1’ is just to speed things up a bit.
I have seen a different version of the script which is a little less verbose in the output, but may be somewhat harder to remember to do. I found it on Ciscos support forum, but it does have a few drawbacks. My concern with using this script is that the regexp looks for the ‘!!!’, which does not take into account of ARPing failures.
tclsh
foreach ip {
1.1.1.1
2.2.2.2
} {
if { [regexp "(!!!)" [exec "ping $ip timeout 1" ]] } {
puts "$ip"
} else { puts "$ip **** failed ***" }
}
The trouble with the scripts are still the fact the you need to punch in all the different IP addresses of the lab which can be tedious at best. The CCIE lab uses Putty for the CLI access (and so should you when practicing!) and here is a little trick that will make your life so much better 
An often overlooked Putty feature is the ability to mark columns within the Putty window. Before marking hold down the ALT key. This makes it possible to mark whatever you like (works great for logs as well).
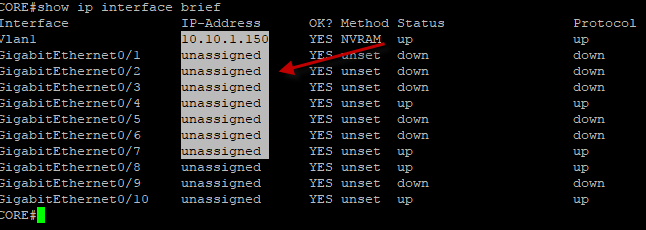
You can select columns alone in Putty, which is great for getting the addresses for the script
Issue the ‘show ip interface brief | e unassigned’, and do the ALT copy of just the desired column and put that into the testing script. Do this for every router and switch and you have a complete reach-ability list for your CCIE lab. It will save you a lot of time and help in troublshooting and in the lab, time is the differentiation between failure and success (because you know all the tech stuff by now!).
Another little tip is to enable “debug ip routing” and leave it on. This way you will notice if something gets broken down the line in the lab…
Be the first to comment on "CCIE LAB verification script"